New product features | The latest in technology | The weekly debugging nightmares & more!

How to add credential authentication using Auth.js & Next 14
January 6, 2024
Nader Elmahdy
Take my knowledge and shove it up your brain...
Allow users to login using their email & password.
In this article, we'll learn how to implement credential authentication using Auth.js, Next.JS 14, and Primsa.
This will be a basic implementation, we'll add 2-factor authentication, and password reset functionalities in separate articles.
Get started
To get started, we'll create a new next.js app using npx create-next-app@latest auth-demo.
Accept all the default settings and wait for the packages to install.
After all is done run the project by typing npm run dev or yarn dev .
Folder structure
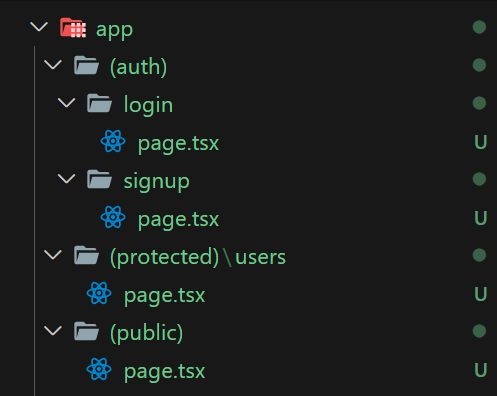
To get a general idea of how we're going to structure our folder:
We'll have 3 group routes:
- (public): contains all the public routes that can be accessed without having to log in.
- (protected) requires the user to log in before accessing these routes.
- (auth) will contain the routes responsible for authentication like the login / sign-up
Public pages
We're gonna have 1 public page, which is the home page of our project.
The first thing you need to do is create a (public) folder inside the app folder.
Then move the page.tsx which is the home page inside the public folder.
This isn't a necessary step, but it helps to keep things organized.
Protected pages
For the protected pages, we'll have 1 page, let's call it users.
Inside the (protected) folder, go ahead and create a users folder and a page.tsx inside it.
This page will contain the info of the currently logged-in user, but for now, it will be an empty page.
app/(protected)/users/page.tsx
1import { NextPage } from "next";
2
3type UsersPageProps = {};
4
5const UsersPage: NextPage = async ({}: UsersPageProps) => {
6  return (
7    <>
8     users page
9    </>
10  );
11};
12
13export default UsersPage;
14
Auth pages
In the (auth) folder we'll have 2 pages: login and signup pages.
Both pages will be empty for now.
login/page.tsx
1import { NextPage } from "next";
2
3type LoginPageProps = {};
4
5const LoginPage: NextPage = async ({}: LoginPageProps) => {
6  return <>login page</>;
7};
8
9export default LoginPage;
10
signup/page.tsx
1import { NextPage } from "next";
2
3type SignUpPageProps = {};
4
5const SignUpPage: NextPage = async ({}: SignUpPageProps) => {
6  return <>sign up page</>;
7};
8
9export default SignUpPage;
10
So far your folder structure should look like this:
Adding authentication
So far all the pages are accessible by anyone, even the users page, so let's implement the authentication in our app.
At the time of writing this article, v5 of next-auth is still in beta, so we'll install it using the command npm i next-auth@beta.
Don't get confused between next-auth and auth.js, they're basically the same, but they decided to change its name to auth.js starting from v5.
Middleware
We'll use a middleware that will run on every page we visit.
It will be responsible for allowing or preventing users from accessing certain pages.
Before we proceed with the middleware file, let's create a routes.ts file.
It will hold all the public routes in a separate file, so we can easily modify them later.
At the root of the project create routes.ts .
routes.ts
1export const publicRoutes = ["/"];
2
3export const authRoutes = ["/login", "/signup"];
4
5//We make sure the authentication API route is always public.
6export const apiRoute = "/api/auth";
7
8// redirect users to this path after login
9export const DEFAULT_LOGIN_REDIRECT = "/users";
10
We will also need auth.config.ts file that will have the provider and will be responsible for the login process, but we'll leave it empty for now.
At the root of the project, create auth.config.ts
auth.config.ts
1import type { NextAuthConfig } from "next-auth";
2
3export default {
4  providers: [],
5} satisfies NextAuthConfig;
6
Now go back to the middleware.ts file.
Here's what the middleware does:
- It checks if there's a logged-in user or not
- It checks the page the user is trying to visit.
- If the user is logged in, he will be allowed to visit the protected routes, if not he will be redirected to the login page.
middleware.ts
1import NextAuth from "next-auth";
2
3import authConfig from "@/auth.config";
4
5import {
6  DEFAULT_LOGIN_REDIRECT,
7  apiRoute,
8  authRoutes,
9  publicRoutes,
10} from "@/routes";
11
12const { auth } = NextAuth(authConfig);
13
14export default auth((req) => {
15  const { nextUrl } = req;
16  const isLoggedIn = !!req.auth;
17
18  const isApiAuthRoute = nextUrl.pathname.startsWith(apiRoute);
19  const isPublicRoute = publicRoutes.includes(nextUrl.pathname);
20  const isAuthRoute = authRoutes.includes(nextUrl.pathname);
21
22  // The API auth route should be public to anyone
23  if (isApiAuthRoute) {
24    return null;
25  }
26
27  if (isAuthRoute) {
28    if (isLoggedIn) {
29      return Response.redirect(new URL(DEFAULT_LOGIN_REDIRECT, nextUrl));
30    }
31    return null;
32  }
33
34  if (!isLoggedIn && !isPublicRoute) {
35    let callbackUrl = nextUrl.pathname;
36    if (nextUrl.search) {
37      callbackUrl += nextUrl.search;
38    }
39
40    const encodedCallbackUrl = encodeURIComponent(callbackUrl);
41
42    return Response.redirect(
43      new URL(`/login?callbackUrl=${encodedCallbackUrl}`, nextUrl)
44    );
45  }
46
47  return null;
48});
49
50// Optionally, don't invoke Middleware on some paths
51export const config = {
52  matcher: ["/((?!.+\\.[\\w]+$|_next).*)", "/", "/(api|trpc)(.*)"],
53};
54
Now try to visit the users page.
And as you can see, I get redirected to the login page, so now all the pages are protected except the ones we defined in the routes.ts file (publicRoutes, authRoutes, apiRoute)
In case you're wondering, I changed the background color of the body to this:
globals.css
1body {
2  background-image: linear-gradient(
3    to right top,
4    #d16ba5,
5    #c777b9,
6    #ba83ca,
7    #aa8fd8,
8    #9a9ae1,
9    #8aa7ec,
10    #79b3f4,
11    #69bff8,
12    #52cffe,
13    #41dfff,
14    #46eefa,
15    #5ffbf1
16  );
17}
18
Prisma
Now that we have our pages protected, we need a way to allow the users to log in.
But before we start building the login form, we're gonna use Prisma with PostgreSQL, so let's get that out of the way first.
First, install Prisma using the command :
npm i prisma @prisma/client
Then run npx prisma init .
Now you should have a prisma folder at the root of your project with the schema file in it.
You also should have a .env file with a fake connection string to a database. Let's get our connection string.
Head to Neon and create an account.
After you create your account, create a new project
In your project dashboard click on the connection string and select Prisma.
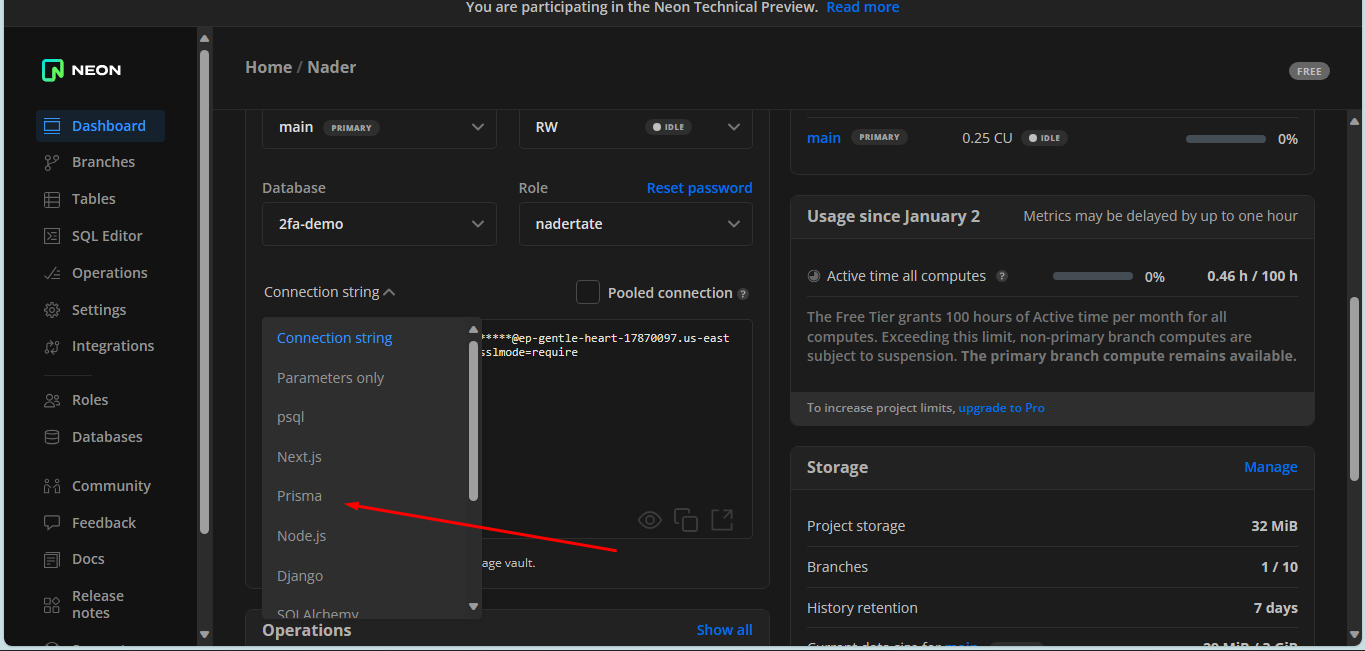
Copy the connection strings from the .env tab and paste them into your .env file.
And while you're in it create an AUTH_SECRET variable, we'll need it later when we set up auth.js.
It can be anything you want like 123johnboy69, but it's recommended that you create a complex secret and keep it safe.
Now your schema.prisma file should look like this:
schema.prisma
1datasource db {
2  provider  = "postgresql"
3  url       = env("DATABASE_URL")
4  directUrl = env("DIRECT_URL")
5}
6
7generator client {
8  provider = "prisma-client-js"
9}
10
Alright, Let's build our User model.
the user will have a name, email, and password, so his schema will look like this:
schema.prisma
1model User {
2  id                    String                 @id @default(cuid())
3  name                  String?
4  email                 String?                @unique
5  password              String?
6  accounts              Account[]
7  }
The accounts model will store the user's session token
schema.prisma
1model Account {
2  id                String  @id @default(cuid())
3  userId            String
4  type              String
5  provider          String
6  providerAccountId String
7  refresh_token     String? @db.Text
8  access_token      String? @db.Text
9  expires_at        Int?
10  token_type        String?
11  scope             String?
12  id_token          String? @db.Text
13  session_state     String?
14
15  user User @relation(fields: [userId], references: [id], onDelete: Cascade)
16
17  @@unique([provider, providerAccountId])
18}
So the final code for the schema file should look like this:
schema.prisma
1datasource db {
2  provider  = "postgresql"
3  url       = env("DATABASE_URL")
4  directUrl = env("DIRECT_URL")
5}
6
7generator client {
8  provider = "prisma-client-js"
9}
10
11model User {
12  id                    String                 @id @default(cuid())
13  name                  String?
14  email                 String?                @unique
15  password              String?
16  accounts              Account[]
17}
18
19model Account {
20  id                String  @id @default(cuid())
21  userId            String
22  type              String
23  provider          String
24  providerAccountId String
25  refresh_token     String? @db.Text
26  access_token      String? @db.Text
27  expires_at        Int?
28  token_type        String?
29  scope             String?
30  id_token          String? @db.Text
31  session_state     String?
32
33  user User @relation(fields: [userId], references: [id], onDelete: Cascade)
34
35  @@unique([provider, providerAccountId])
36}
Now run npx prisma generate in your terminal.
After the new models are generated run npx prisma db push.
And finally, at the project root create a lib folder and inside it a prisma.ts file.
prisma.ts
1import { PrismaClient } from "@prisma/client";
2
3declare global {
4  var prisma: PrismaClient | undefined;
5}
6
7export const prisma = globalThis.prisma || new PrismaClient();
8
9if (process.env.NODE_ENV !== "production") globalThis.prisma = prisma;
10
And with that we're done with Prisma, you can check the tables section at console.neon.tech you should find the users and accounts tables.
Now we can start working on the forms.
We will create the signup and login forms then we'll write the actions that handle the data submitted.
I'll use NextUI as it's my favorite UI library, you can use any library that you want or you can do everything manually.
Installing NextUI
Run npm i @nextui-org/react framer-motion to install nextUI
If you're wondering why we're we're installing framer motion, that's because nextUI doesn't work without it.
We'll need to wrap the entire application in NextUIProvider
I prefer to create a component, name it ClientProviders, and have all the client providers in it (theme provider, session provider, etc...)
Create a components folder at your app root and create ClientProviders.tsx component inside of it.
ClientProviders.tsx
1import { NextUIProvider } from "@nextui-org/react";
2
3type Props = { children: React.ReactNode };
4
5const CientProviders = ({ children }: Props) => {
6  return <NextUIProvider>{children}</NextUIProvider>;
7};
8
9export default CientProviders;
10
Now you'll need to wrap your app in this provider.
Go to the root layout and wrap the children inside the ClientProviders component.
layout.tsx
1import "./globals.css";
2import type { Metadata } from "next";
3import { Inter } from "next/font/google";
4
5const inter = Inter({ subsets: ["latin"] });
6
7export const metadata: Metadata = {
8  title: "Auth demo",
9  description: "learn credential authentication with nextjs",
10};
11
12export default function RootLayout({
13  children,
14}: {
15  children: React.ReactNode;
16}) {
17  return (
18    <html lang="en">
19      <body className={inter.className + " min-h-screen"}>{children}</body>
20    </html>
21  );
22}
23
Finally, go to your tailwind.config.ts file and add the following line at the top:
const { nextui } =require("@nextui-org/react");
Then add the following line to the content:
"./node_modules/@nextui-org/theme/dist/**/*.{js,ts,jsx,tsx}",And finally add nextui() to the plugins array.
The final tailwind.config.ts file code should look like this:
tailwind.config.ts
1const { nextui } = require("@nextui-org/react");
2
3import type { Config } from "tailwindcss";
4
5const config: Config = {
6  content: [
7    "./node_modules/@nextui-org/theme/dist/**/*.{js,ts,jsx,tsx}",
8    "./pages/**/*.{js,ts,jsx,tsx,mdx}",
9    "./components/**/*.{js,ts,jsx,tsx,mdx}",
10    "./app/**/*.{js,ts,jsx,tsx,mdx}",
11  ],
12  theme: {
13    extend: {},
14  },
15  plugins: [nextui()],
16};
17export default config;
18
Sign up form
In your components folder create RegisterForm.tsx
RegisterForm.tsx
1"use client";
2
3import {
4  Card,
5  CardHeader,
6  CardBody,
7  Divider,
8  Link as NUILink,
9  Input,
10  Button,
11} from "@nextui-org/react";
12import Link from "next/link";
13
14type RegisterFormProps = {};
15
16export const RegisterForm = ({}: RegisterFormProps) => {
17
18  return (
19    <Card className="w-[400px]">
20      <CardHeader className="flex justify-center">
21        <h1 className="text-xl font-bold">Sign up</h1>
22      </CardHeader>
23      <Divider />
24      <CardBody>
25        <form
26          className="space-y-3 flex flex-col items-center"
27        >
28          <Input
29            variant="bordered"
30            label="Name"
31            type="text"
32
33          />
34          <Input
35            variant="bordered"
36            label="Email"
37            type="email"
38          />
39          <Input
40            variant="bordered"
41            label="Password"
42            type="password"
43          />
44          <Button
45            color="primary"
46            fullWidth
47            type="submit"
48          >
49            Sign up
50          </Button>
51          <NUILink as={Link} color="primary" href="/login" className="text-sm">
52            Already have an account? Login
53          </NUILink>
54        </form>
55      </CardBody>
56    </Card>
57  );
58};
59
This is a very basic form, it doesn't submit any data, we'll leave it at that for now, create the login form then create submit actions for both.
Login form
Create LoginForm.tsx in your components folder.
LoginForm.tsx
1"use client";
2
3import {
4  Card,
5  CardHeader,
6  CardBody,
7  Divider,
8  Link as NUILink,
9  Input,
10  Button,
11} from "@nextui-org/react";
12import Link from "next/link";
13
14type Props = {};
15
16export const LoginForm = ({}: Props) => {
17  return (
18    <Card className="w-[400px]">
19      <CardHeader className="flex justify-center">
20        <h1 className="text-xl font-bold">Login</h1>
21      </CardHeader>
22      <Divider />
23      <CardBody>
24        <form
25          className="space-y-3 flex flex-col items-center"
26        >
27          <Input
28            variant="bordered"
29            label="Email"
30            type="email"
31          />
32          <Input
33            variant="bordered"
34            label="Password"
35            type="password"
36          />
37          <Button
38            type="submit"
39            color="primary"
40            fullWidth
41          >
42            Login
43          </Button>
44        </form>
45      </CardBody>
46    </Card>
47  );
48};
49
Form validation
We'll use zod to validate the forms data, and react-hook-form to manage the forms states.
We'll need to install the following packages:
npm i zod react-hook-forms @hookform/error-message @hookform/resolvers
@hookform/error-message is used to display an error in case of a missing input field (eg: Name is required, email is required, etc...)
Zod schemas
We'll use zod, so we'll need 2 zod schemas, one for the login and one for the signup.
Create a schemas.ts file at the project root.
schemas.ts
1import * as z from "zod";
2
3export const LoginSchema = z.object({
4  email: z.string().email({
5    message: "Email is required",
6  }),
7  password: z.string().min(1, {
8    message: "Password is required",
9  }),
10  code: z.optional(z.string()),
11});
12
13export const RegisterSchema = z.object({
14  name: z.string().min(1, {
15    message: "Name is required",
16  }),
17  email: z.string().email({
18    message: "Email is required",
19  }),
20  password: z.string().min(6, {
21    message: "Minimum 6 characters required",
22  }),
23});
24
Utils
We'll need some functions that will help us get the user info.
At the root of your project, create a utils folder and inside it create a users.ts file.
utils/users.ts
1import { prisma } from "@/lib/prisma";
2
3export const getUserByEmail = async (email: string) => {
4  try {
5    const user = await prisma.user.findUnique({ where: { email } });
6    return user;
7  } catch {
8    return null;
9  }
10};
11
12export const getUserById = async (id: string) => {
13  try {
14    const user = await prisma.user.findUnique({ where: { id } });
15    return user;
16  } catch {
17    return null;
18  }
19};
20
These functions will help us get the user either by email or id.
Create a new account.
Before users can log in, they obviously need to create an account first, so let's do that.
We'll create a server action that receives the values from the register form, validates the data on the server then submits it to the database.
At the project root create an actions folder.
create a signup.ts file inside of it.
We don't want to store plain passwords inside the database, we shold encrypt them first, for that we can use bcryptjs.
npm i bcryptjs @types/bcryptjs
actions/signup.ts
1"use server";
2
3import * as z from "zod";
4import bcrypt from "bcryptjs";
5
6import { prisma } from "@/lib/prisma";
7import { RegisterSchema } from "@/schemas";
8import { getUserByEmail } from "@/utils/users";
9
10export const signup = async (values: z.infer<typeof RegisterSchema>) => {
11  const validatedFields = RegisterSchema.safeParse(values);
12
13  if (!validatedFields.success) {
14    return { error: "Invalid fields!" };
15  }
16
17  const { email, password, name } = validatedFields.data;
18  const hashedPassword = await bcrypt.hash(password, 10);
19
20  const existingUser = await getUserByEmail(email);
21
22  if (existingUser) {
23    return { error: "Email already in use!" };
24  }
25
26  await prisma.user.create({
27    data: {
28      name,
29      email,
30      password: hashedPassword,
31    },
32  });
33
34  return { success: "Account created successfully" };
35};
36
The above code recieves the name, email and password, checks if there's a user with that email, if there's return an error, if not encryp the password and submit the data to the database.
Now we need to use that in our Register form.
Go back to the RegisterForm.tsx and import the following:
RegisterForm.tsx
1import * as z from "zod";
2import { useState, useTransition } from "react";
3import { useForm } from "react-hook-form";
4import { RegisterSchema } from "@/schemas";
5import { zodResolver } from "@hookform/resolvers/zod";
6import { ErrorMessage } from "@hookform/error-message";
7import { signup } from "@/actions/signup";
8
Then inside the component function define the following states:
RegisterForm.tsx
1  const [error, setError] = useState<string | undefined>("");
2  const [success, setSuccess] = useState<string | undefined>("");
3  const [isPending, startTransition] = useTransition();
These will store the success or error messages returned from the server action.
Now we need to use react-hook-form to validate our form inputs and make sure no inputs are missing.
RegisterForm.tsx
1 const {
2    register,
3    handleSubmit,
4    formState: { errors },
5  } = useForm<z.infer<typeof RegisterSchema>>({
6    resolver: zodResolver(RegisterSchema),
7    defaultValues: {
8      name: "",
9      email: "",
10      password: "",
11    },
12  });
And finally the submit function that calls the server action.
RegisterForm.tsx
1  const onSubmit = (values: z.infer<typeof RegisterSchema>) => {
2    setError("");
3    setSuccess("");
4
5    startTransition(() => {
6      signup(values).then((data) => {
7        setError(data.error);
8        setSuccess(data.success);
9      });
10    });
11  };
We'll need to modify each input field to use react-hook-form validation and display an error message beneath it if there's one.
RegisterForm.tsx
1<Input
2            variant="bordered"
3            label="Name"
4            type="text"
5            {...register("name")}
6          />
7
8          <ErrorMessage
9            errors={errors}
10            name="name"
11            render={({ message }) => (
12              <p className="text-red-500 text-sm text-left w-full">{message}</p>
13            )}
14          />
Here's the final code for the Register form:
RegisterForm.tsx
1"use client";
2
3import * as z from "zod";
4import { useState, useTransition } from "react";
5import { useForm } from "react-hook-form";
6import { RegisterSchema } from "@/schemas";
7import { zodResolver } from "@hookform/resolvers/zod";
8import { ErrorMessage } from "@hookform/error-message";
9
10import {
11  Card,
12  CardHeader,
13  CardBody,
14  Divider,
15  Link as NUILink,
16  Input,
17  Button,
18} from "@nextui-org/react";
19import Link from "next/link";
20import {} from "react";
21import { signup } from "@/actions/signup";
22
23type SignUpProps = {};
24
25export const SignUpForm = ({}: SignUpProps) => {
26  const [error, setError] = useState<string | undefined>("");
27  const [success, setSuccess] = useState<string | undefined>("");
28  const [isPending, startTransition] = useTransition();
29
30  const {
31    register,
32    handleSubmit,
33    formState: { errors },
34  } = useForm<z.infer<typeof RegisterSchema>>({
35    resolver: zodResolver(RegisterSchema),
36    defaultValues: {
37      name: "",
38      email: "",
39      password: "",
40    },
41  });
42  const onSubmit = (values: z.infer<typeof RegisterSchema>) => {
43    setError("");
44    setSuccess("");
45
46    startTransition(() => {
47      signup(values).then((data) => {
48        setError(data.error);
49        setSuccess(data.success);
50      });
51    });
52  };
53
54  return (
55    <Card className="w-[400px]">
56      <CardHeader className="flex justify-center">
57        <h1 className="text-xl font-bold">Sign up</h1>
58      </CardHeader>
59      <Divider />
60      <CardBody>
61        <form
62          className="space-y-3 flex flex-col items-center"
63          onSubmit={handleSubmit(onSubmit)}
64        >
65          <Input
66            variant="bordered"
67            label="Name"
68            type="text"
69            {...register("name")}
70          />
71
72          <ErrorMessage
73            errors={errors}
74            name="name"
75            render={({ message }) => (
76              <p className="text-red-500 text-sm text-left w-full">{message}</p>
77            )}
78          />
79          <Input
80            variant="bordered"
81            label="Email"
82            type="email"
83            {...register("email")}
84          />
85          <ErrorMessage
86            errors={errors}
87            name="email"
88            render={({ message }) => (
89              <p className="text-red-500 text-sm text-left w-full">{message}</p>
90            )}
91          />
92          <Input
93            variant="bordered"
94            label="Password"
95            type="password"
96            {...register("password")}
97          />
98          <ErrorMessage
99            errors={errors}
100            name="password"
101            render={({ message }) => (
102              <p className="text-red-500 text-sm text-left w-full">{message}</p>
103            )}
104          />
105          {
106            error && <p className="text-red-500 text-sm text-left w-full">{error}</p>
107          }
108          {
109            success && <p className="text-green-500 text-sm text-left w-full">{success}</p>
110          }
111          <Button
112            color="primary"
113            fullWidth
114            type="submit"
115            isDisabled={isPending}
116            isLoading={isPending}
117          >
118            Sign up
119          </Button>
120          <NUILink as={Link} color="primary" href="/login" className="text-sm">
121            Already have an account? Login
122          </NUILink>
123        </form>
124      </CardBody>
125    </Card>
126  );
127};
128
Now let's try to signup.

As you can see it's wroking perfectly but there's a slight issue.
Users' would expect to be logged-in and redirected after they create their accout, we'll do that after we implement the login feature.
Log in
Go back to auth.config.ts file and modify it like this:
auth.config.ts
1import bcrypt from "bcryptjs";
2import type { NextAuthConfig } from "next-auth";
3import Credentials from "next-auth/providers/credentials";
4
5import { LoginSchema } from "@/schemas";
6import { getUserByEmail } from "@/utils/users";
7
8export default {
9  providers: [
10    Credentials({
11      async authorize(credentials) {
12        const validatedFields = LoginSchema.safeParse(credentials);
13        if (validatedFields.success) {
14          const { email, password } = validatedFields.data;
15          const user = await getUserByEmail(email);
16          if (!user || !user.password) return null;
17          const passwordsMatch = await bcrypt.compare(password, user.password);
18          if (passwordsMatch) return user;
19        }
20        return null;
21      },
22    }),
23  ],
24} satisfies NextAuthConfig;
25
This uses zod to validate the inputs fields and checks if the password is correct.
Now create a auth.ts file at the root of your project.
auth.ts
1import NextAuth from "next-auth";
2import { PrismaAdapter } from "@auth/prisma-adapter";
3
4import { prisma } from "./lib/prisma";
5import authConfig from "@/auth.config";
6
7
8export const {
9  handlers: { GET, POST },
10  auth,
11  signIn,
12  signOut,
13  update,
14} = NextAuth({
15  pages: {
16    signIn: "/login",
17    error: "/error",
18  },
19
20  adapter: PrismaAdapter(prisma),
21  session: { strategy: "jwt" },
22  ...authConfig,
23});
24
This exports the following functions:
- auth: to get the current session on the server side.
- signIn: to sign in.
- signOut: to sign out
- update: to update the session if the user changes his data (we won't need it now).
And finally create the following api route:
app/api/auth/[...nextauth]/route.ts
[...nextauth]/rotue.ts
1export { GET, POST } from "@/auth";
2
Because we're using primsa we can't have the logic and configuration inside that rote and we had to separate them.
Now we need to create a server action that handles the login.
Just like with the signup, in your actions folder create a login.ts file.
actions/login.ts
1"use server";
2
3import * as z from "zod";
4import { AuthError } from "next-auth";
5
6import { signIn } from "@/auth";
7import { LoginSchema } from "@/schemas";
8import { getUserByEmail } from "@/utils/users";
9
10import { DEFAULT_LOGIN_REDIRECT } from "@/routes";
11
12
13export const login = async (
14  values: z.infer<typeof LoginSchema>,
15  callbackUrl?: string | null
16) => {
17  const validatedFields = LoginSchema.safeParse(values);
18
19  if (!validatedFields.success) {
20    return { error: "Invalid fields!" };
21  }
22
23  const { email, password } = validatedFields.data;
24
25  const existingUser = await getUserByEmail(email);
26
27  if (!existingUser || !existingUser.email || !existingUser.password) {
28    return { error: "Email does not exist!" };
29  }
30
31  try {
32    await signIn("credentials", {
33      email,
34      password,
35      redirectTo: callbackUrl || DEFAULT_LOGIN_REDIRECT,
36    });
37    return { success: "Successfully logged in!" };
38  } catch (error) {
39    if (error instanceof AuthError) {
40      switch (error.type) {
41        case "CredentialsSignin":
42          return { error: "Invalid credentials!" };
43        default:
44          return { error: "Something went wrong!" };
45      }
46    }
47
48    throw error;
49  }
50};
51
Just like the sign up , this validates the input fileds on the server, checks if email exists in the database, if so try to signIn and if the password is wrong return an error.
So now we can go back to our LoginForm.tsx file and modify it.
LoginForm.tsx
1"use client";
2import * as z from "zod";
3import { useForm } from "react-hook-form";
4import { useState, useTransition } from "react";
5import { useSearchParams } from "next/navigation";
6import { zodResolver } from "@hookform/resolvers/zod";
7import { LoginSchema } from "@/schemas";
8import { login } from "@/actions/login";
9
10import {
11  Card,
12  CardHeader,
13  CardBody,
14  Divider,
15  Link as NUILink,
16  Input,
17  Button,
18} from "@nextui-org/react";
19import Link from "next/link";
20import { ErrorMessage } from "@hookform/error-message";
21type Props = {};
22
23export const LoginForm = ({}: Props) => {
24  const searchParams = useSearchParams();
25  const callbackUrl = searchParams.get("callbackUrl");
26  const [error, setError] = useState<string | undefined>("");
27  const [success, setSuccess] = useState<string | undefined>("");
28  const [isPending, startTransition] = useTransition();
29  const {
30    reset,
31    register,
32    handleSubmit,
33    formState: { errors },
34  } = useForm<z.infer<typeof LoginSchema>>({
35    resolver: zodResolver(LoginSchema),
36    defaultValues: {
37      email: "",
38      password: "",
39    },
40  });
41
42  const onSubmit = (values: z.infer<typeof LoginSchema>) => {
43    setError("");
44    setSuccess("");
45
46    startTransition(() => {
47      login(values, callbackUrl)
48        .then((data) => {
49          if (data?.error) {
50            reset();
51            setError(data.error);
52          }
53
54          if (data?.success) {
55            reset();
56            setSuccess(data.success);
57          }
58        })
59        .catch(() => setError("Something went wrong"));
60    });
61  };
62  return (
63    <Card className="w-[400px]">
64      <CardHeader className="flex justify-center">
65        <h1 className="text-xl font-bold">Login</h1>
66      </CardHeader>
67      <Divider />
68      <CardBody>
69        <form
70          onSubmit={handleSubmit(onSubmit)}
71          className="space-y-3 flex flex-col items-center"
72        >
73          <Input
74            variant="bordered"
75            label="Email"
76            type="email"
77            {...register("email")}
78          />
79          <ErrorMessage
80            errors={errors}
81            name="email"
82            render={({ message }) => (
83              <p className="text-red-500 text-sm text-left w-full">{message}</p>
84            )}
85          />
86          <Input
87            variant="bordered"
88            label="Password"
89            type="password"
90            {...register("password")}
91          />
92          <ErrorMessage
93            errors={errors}
94            name="password"
95            render={({ message }) => (
96              <p className="text-red-500 text-sm text-left w-full">{message}</p>
97            )}
98            />
99            {
100              error && <p className="text-red-500 text-sm text-left w-full">{error}</p>
101            }
102            {
103              success && <p className="text-green-500 text-sm text-left w-full">{success}</p>
104            }
105          <Button
106            type="submit"
107            isLoading={isPending}
108            isDisabled={isPending}
109            color="primary"
110            fullWidth
111          >
112            Login
113          </Button>
114          <NUILink as={Link} href="/signup" color="primary">
115            Don't have an account?
116          </NUILink>
117        </form>
118      </CardBody>
119    </Card>
120  );
121};
122
Now we can try to log in.
Now we can modify the signup action to redirect the users after they sign up.
All we need to do is add the signIn function after the user is created in the database.
actions/login.ts
1"use server";
2
3import * as z from "zod";
4import bcrypt from "bcryptjs";
5
6import { prisma } from "@/lib/prisma";
7import { RegisterSchema } from "@/schemas";
8import { getUserByEmail } from "@/utils/users";
9import { signIn } from "@/auth";
10import { DEFAULT_LOGIN_REDIRECT } from "@/routes";
11
12export const signup = async (values: z.infer<typeof RegisterSchema>) => {
13  const validatedFields = RegisterSchema.safeParse(values);
14
15  if (!validatedFields.success) {
16    return { error: "Invalid fields!" };
17  }
18
19  const { email, password, name } = validatedFields.data;
20  const hashedPassword = await bcrypt.hash(password, 10);
21
22  const existingUser = await getUserByEmail(email);
23
24  if (existingUser) {
25    return { error: "Email already in use!" };
26  }
27
28  await prisma.user.create({
29    data: {
30      name,
31      email,
32      password: hashedPassword,
33    },
34  });
35  await signIn("credentials", {
36    email,
37    password,
38    redirectTo: DEFAULT_LOGIN_REDIRECT,
39  });
40
41  return { success: "Account created successfully" };
42};
43
Now let's that out.
If you try to visit the login or signup pages you will be redirected to the users page because you're logged in.
So just open the project in an incognito browser for now until we add the signOut functionality.
And that is working like a charm.
Now let's see how we can fetch the current session and display the user info.
Get the current session
This is done quite easily on the server side.
Remember we exported a function called auth from the file auth.ts
You can import this function in any server component and it will fetch the current session.
Let's implement it in the users page to dipslay the current user info.
users/page.tsx
1import { auth } from "@/auth";
2import { NextPage } from "next";
3
4import { Card, CardBody } from "@nextui-org/react";
5
6type UsersPageProps = {};
7
8const UsersPage: NextPage = async ({}: UsersPageProps) => {
9  const session = await auth();
10
11  return (
12    <div className="flex items-center justify-center min-h-screen">
13      <Card>
14        <CardBody>
15          <div className="flex items-center gap-5">
16            <p>Logged in as {session?.user.email}</p>
17          </div>
18        </CardBody>
19      </Card>
20    </div>
21  );
22};
23
24export default UsersPage;
25

Logout
To logout we can use the signOut function exported from the auth.ts file, but we'll need to create a server action for it, so we can use it in client components.
In your actions folder create a logout.ts file.
actions/logout.ts
1"use server";
2
3import { signOut } from "@/auth";
4
5export const logout = async () => {
6  await signOut();
7};
8
Now we need to create a separate component that has the logout button, and the reason we make it separate is because we can't attach an onClick function directly inside a server component.
So in your components folder create LogoutButton.tsx
LogoutButton.tsx
1"use client";
2
3import { logout } from "@/actions/logout";
4import { Button } from "@nextui-org/react";
5
6import { HiOutlineLogout } from "react-icons/hi";
7
8type LogoutButtonProps = {};
9
10export const LogoutButton = ({}: LogoutButtonProps) => {
11  return (
12    <Button onClick={async () => await logout()} isIconOnly variant="light">
13      <HiOutlineLogout size={20} className="text-red-500" />
14    </Button>
15  );
16};
17
Import that button in the users page and let's try it out.

And voila everything is working.
Next steps
In the next article, We will learn how to add 2-factor authentication, because now you can create an account with any email even if it's not a real email.
You might also like:

How to add email verification using Auth.js
Enhance your website security by allowing only verified users to log in.

How to enable password reset using auth.js
Forgot your password? now worries, I got your bro.
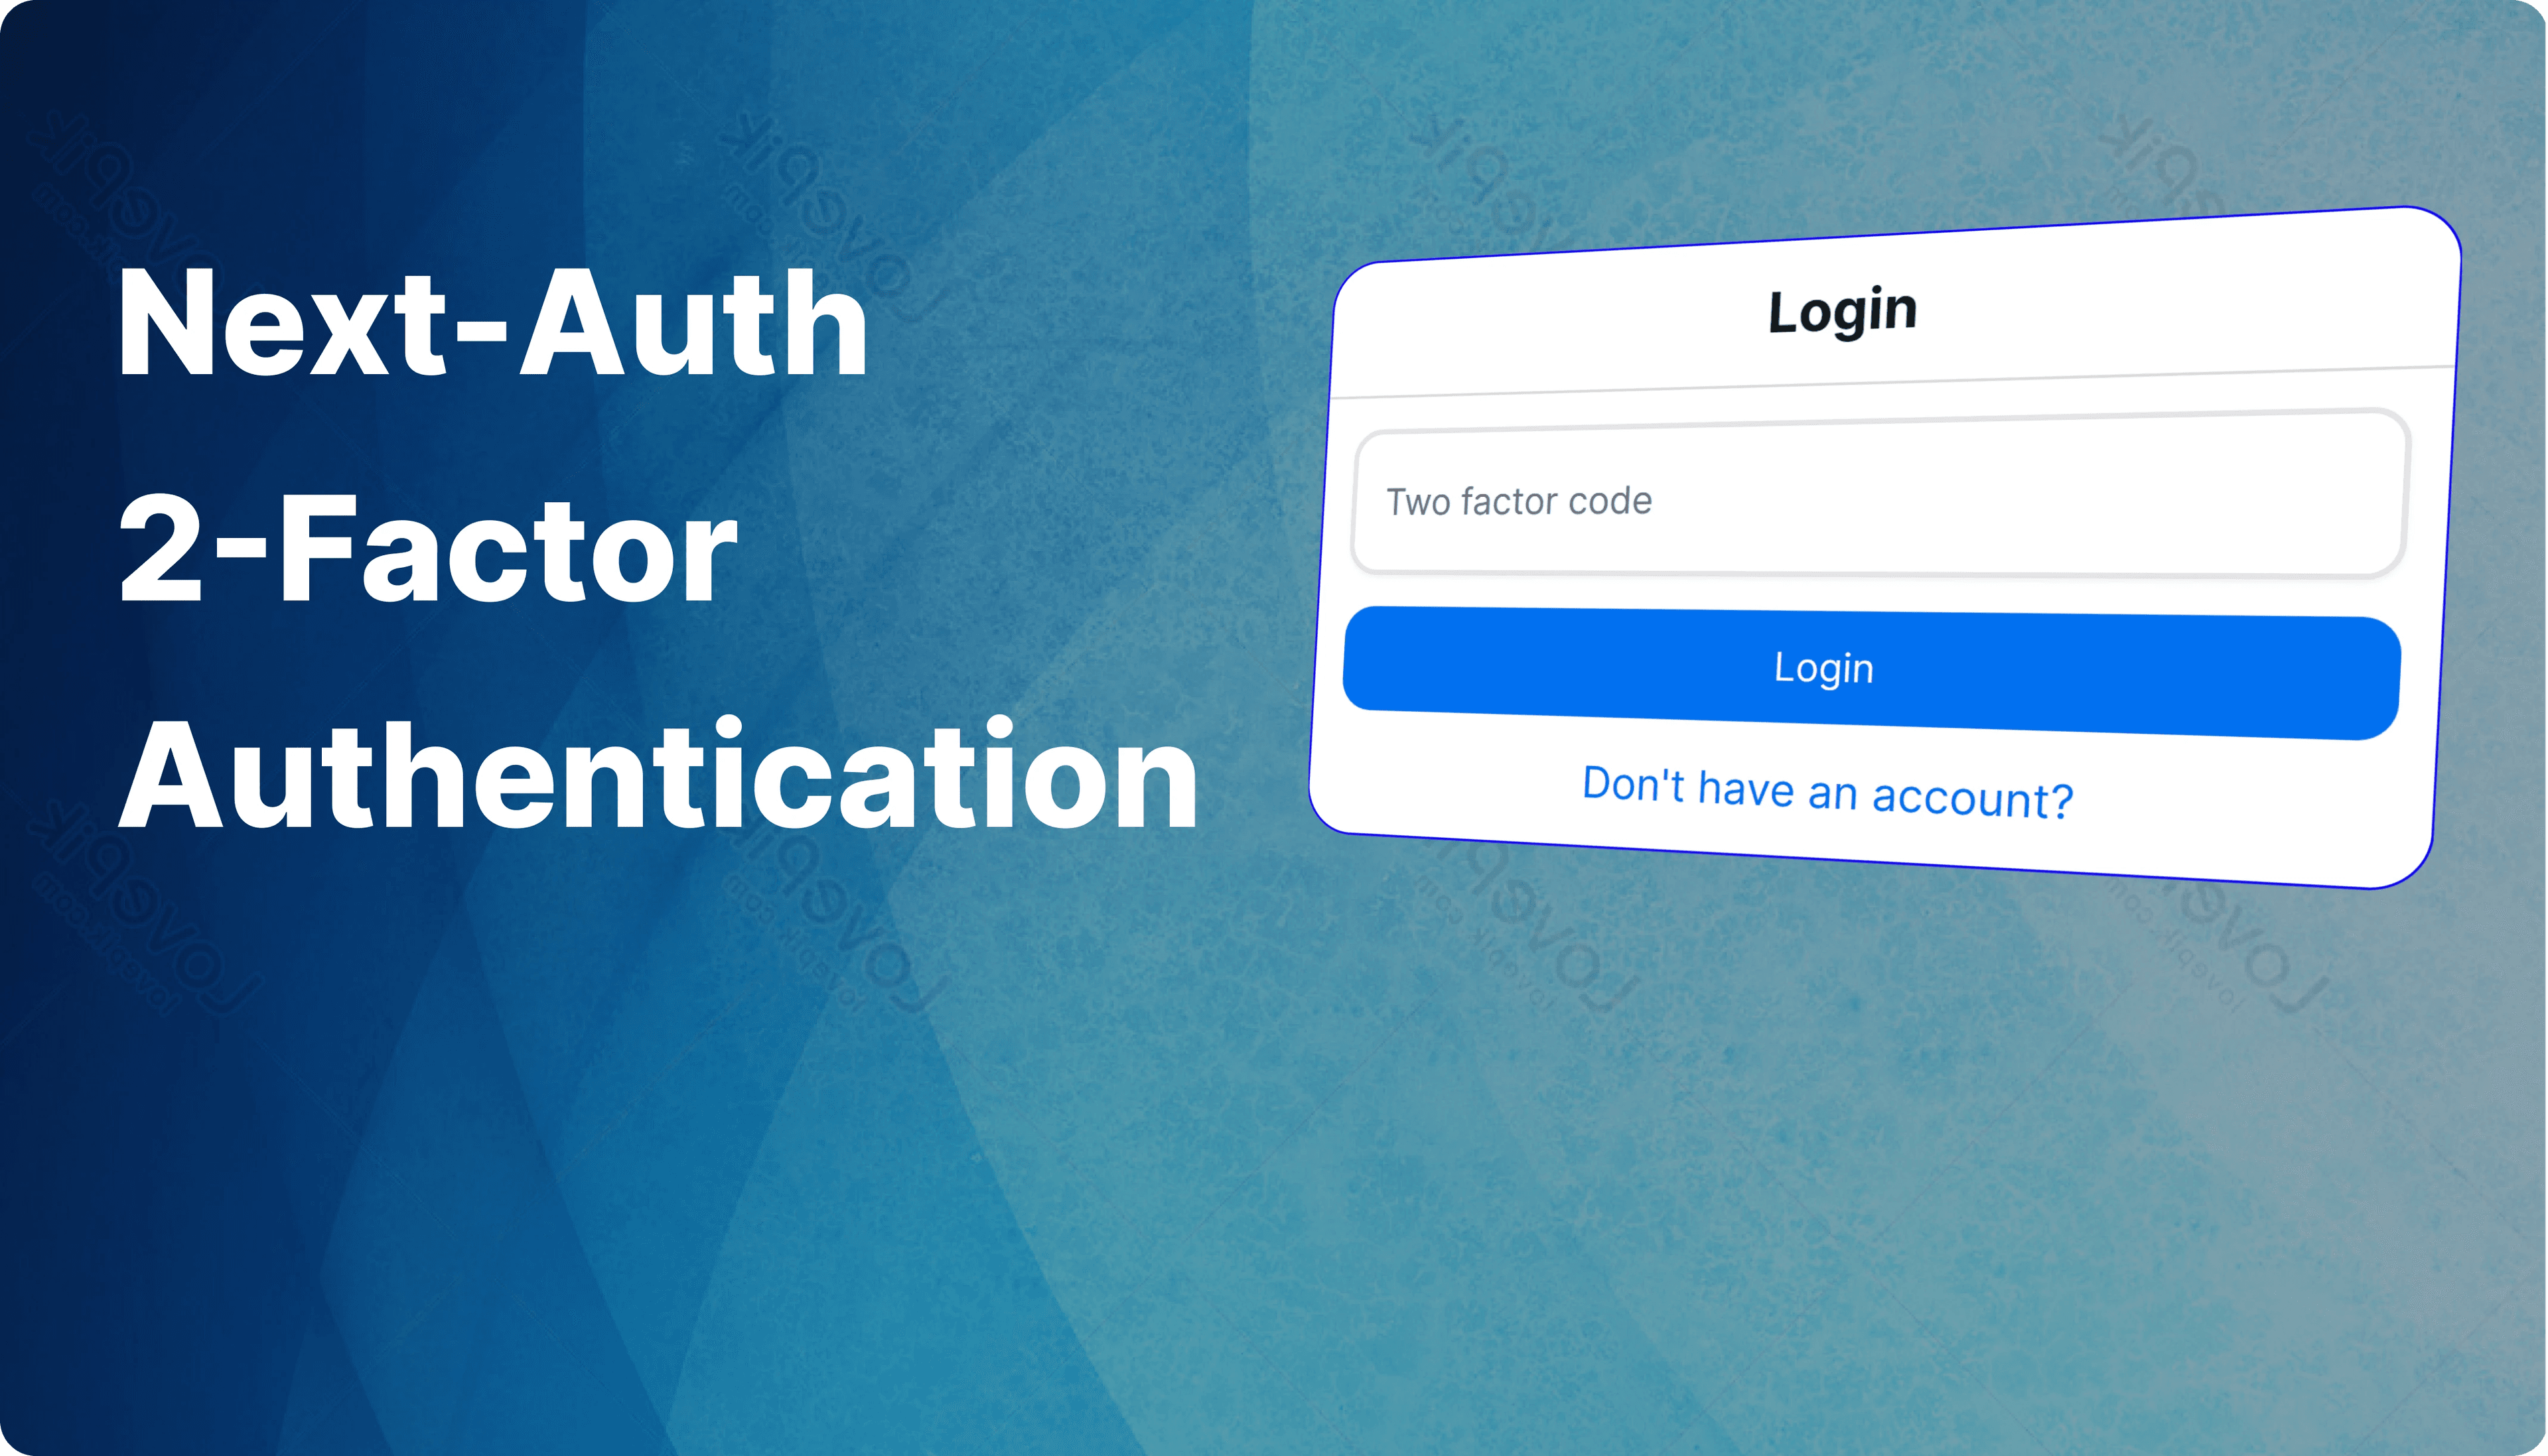
How to add 2-factor authentication
Enhance your users' security using 2-factor authentication

How to use clerk to protect your route handlers
Clerk can also protect route handlers, Nice